This page explains how to set up a serial terminal emulator to operate R2P2 from a PC.
Recommended: Use the R2P2 Web Terminal
If you are using R2P2 3.4 or later, you can use the R2P2 Web Terminal directly from your browser — no installation required.
The R2P2 Web Terminal is the easiest way to get started and is recommended for most users, especially beginners. There is no need to install a separate serial terminal emulator.
Give It a Try!
-
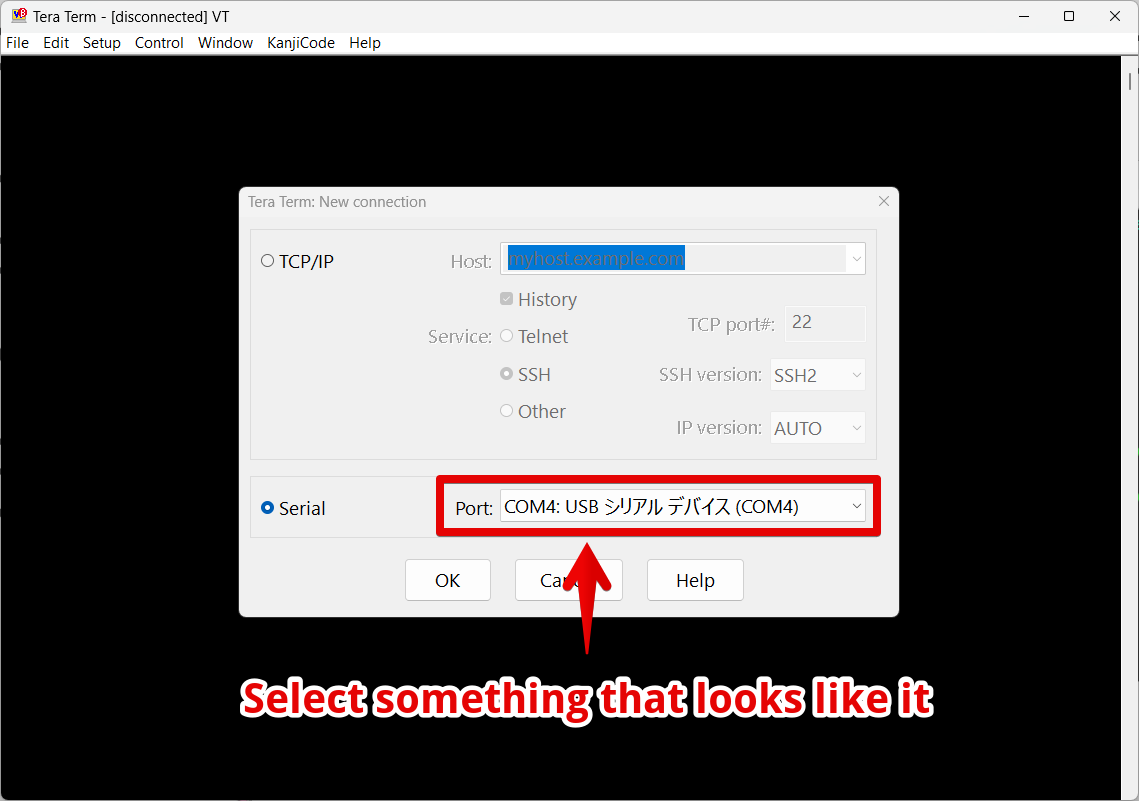
Open a proper serial port on the terminal emulator. This example uses Tera Term in Windows.
-
If you could see a screen like this, congrats, now you are at the gate🎉
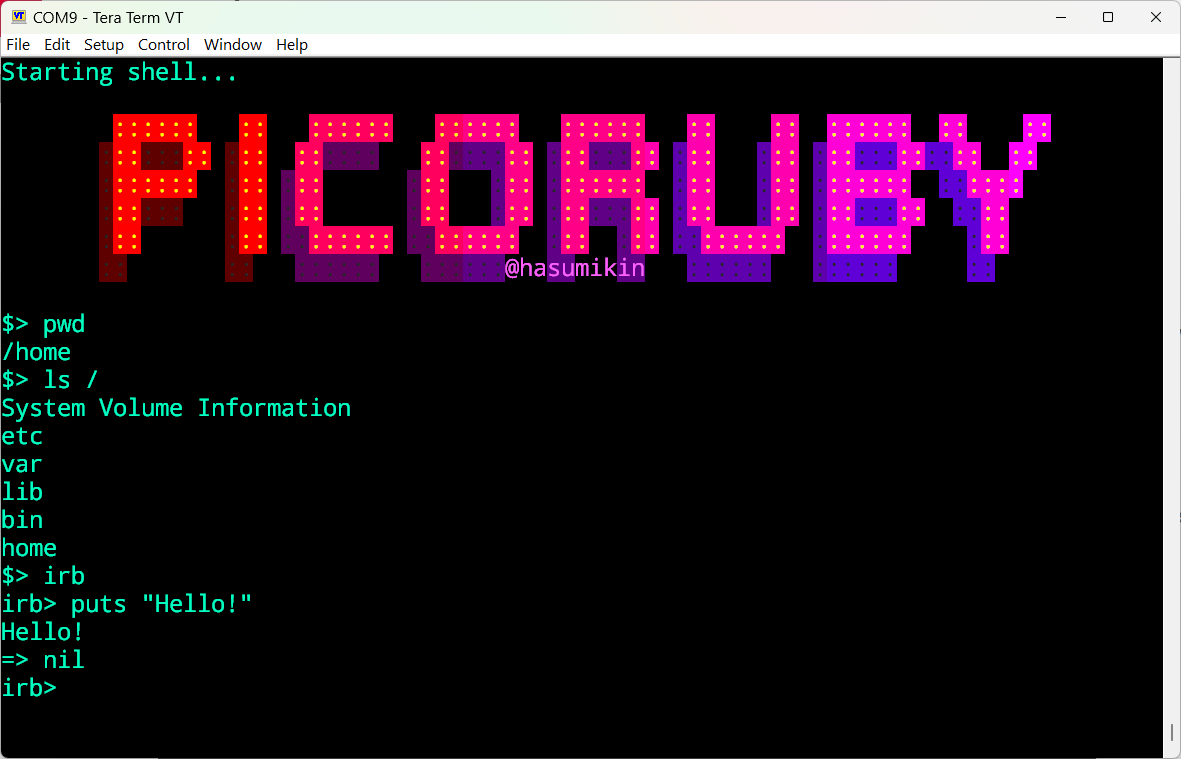
- R2P2 shell is a Unix-like shell, so you can use commands like
ls,cd,cat,rm, etc. irbcommand starts an interactive Ruby shell
- R2P2 shell is a Unix-like shell, so you can use commands like
Congratulations! Now you at the gate!
Before starting to dig into R2P2, we would like you to stargaze at the picoruby/picoruby repo🌟
When You Need a Serial Terminal Emulator
The following setup is only necessary if you have a specific reason to use a dedicated serial terminal emulator (e.g., your environment does not support the Web Terminal, or you prefer a native application).
If the Web Terminal works for you, you can skip the rest of this page.
Setup by Operating System
A serial terminal emulator is required for serial communication with R2P2. Follow the instructions below for your operating system.
Windows
Installing Tera Term
We recommend Tera Term. It’s free, user-friendly, and ideal for serial communication on Windows.
- Download from the Tera Term official website
- Run the installer to complete setup
Linux
Installing GTKTerm
We recommend GTKTerm. It’s a lightweight, GUI-based serial terminal.
Ubuntu/Debian-based systems
sudo apt update
sudo apt install gtkterm
CentOS/RHEL/Fedora-based systems
# Fedora
sudo dnf install gtkterm

# CentOS/RHEL (requires EPEL repository)
sudo yum install epel-release
sudo yum install gtkterm
macOS
Mac Issues
- From our experience, Mac laptops occasionally encounter issues during the workshop
- We are unsure of the specific models that may have problems. Both Intel Macs and M1/M2/M3 Macs have had issues in the past
- Please be aware that we will not be able to know if your Mac will work until the day of the workshop
Implementing a terminal emulator seems to be no easy task, as it involves dealing with escape sequences, timing issues, and all sorts of edge cases that have become complicated due to historical reasons. Unfortunately, we don’t know if there are any serial terminal emulators for macOS comparable to Tera Term or GTKTerm.
So far, you can choose from the following options:
Option 1: screen (Simple method)
Using the screen command.
Note: The screen command may cause display issues with the PicoRuby shell (R2P2), such as garbled text or formatting problems.
Installation
# Using Homebrew
brew install screen

# Using MacPorts
sudo port install screen
In addition to screen, you may also be able to use minicom, picocom, CoolTerm, or PuTTY.
Actually, the author of PicoRuby doesn’t have a Mac, so we can’t decide which one is the best.
Option 2: Ubuntu in Virtual Environment (Recommended)
We recommend this option for a more stable environment.
- Create a virtual machine using VirtualBox or VMware
- Install Ubuntu Desktop
- Install GTKTerm within the virtual environment:
sudo apt update
sudo apt install gtkterm
Note: When using a virtual environment, you need to configure USB serial device passthrough to the virtual machine.
Serial Port Connection Methods
Tera Term (Windows)
- Launch Tera Term
- In the “New Connection” dialog, select “Serial”
- Choose the port number (usually COM3, COM4, etc.)
- Click “OK”
- Set the following in Menu → “Setup” → “Serial port”:
- Baud rate: 115200
- Data bits: 8
- Parity: None
- Stop bits: 1
- Flow control: None
- Set line ending in Menu → “Setup” → “Terminal”:
- New-line: Receive: LF, Transmit: LF
GTKTerm (Linux/Virtual Ubuntu)
- Launch GTKTerm
- Configure in Menu → “Configuration” → “Port”:
- Port:
/dev/ttyUSB0or/dev/ttyACM0(depending on device) - Baud Rate: 115200
- Parity: None
- Bits: 8
- Stopbits: 1
- Flow control: None
- Port:
- Configure line endings in Menu → “Configuration” → “CR LF auto”:
- Enable LF auto (to handle line endings properly)
- Click “OK” to connect
screen (macOS)
- Check devices:
ls /dev/cu.* - Connect with screen:
screen /dev/cu.usbserial-XXXXXX 115200(Replace XXXXXX with the actual device name)
- Configure line endings by pressing
Ctrl+Afollowed by:and enter:crlf off - To exit, press
Ctrl+Afollowed byK, then confirm withy
Troubleshooting
Device not recognized
- Windows: Check COM ports in Device Manager
- Linux: Check USB device recognition with
dmesg | tail - macOS: Check devices with
ls /dev/cu.*
Permission errors (Linux)
Add user to dialout group:
sudo usermod -a -G dialout $USER
Logout and login required after this setting.
Questions & Support
If you encounter any issues during setup, please let us know before the workshop begins. We’ll solve it together!